How to Cut Porcelain Tiles Effectively and Safely
Porcelain tiles are a popular choice for indoor and outdoor spaces thanks to their durability, low porosity, and stylish finish. But cutting them requires the right tools, techniques, and safety precautions to achieve clean, accurate results without damaging the tile or risking injury.
In this guide, we’ll walk through the best practices for cutting porcelain tiles — whether you’re laying a patio or tiling a bathroom — using wet saws, diamond blades, and polishing tools.
Why Porcelain Requires Special Tools
Porcelain is harder and denser than ceramic, natural stone, or cementitious tiles. This strength means it’s highly wear-resistant, but it also makes cutting more difficult. Using standard blades or dry cutting methods can result in:
Chipped or fractured edges
Overheating and blade wear
Inaccurate cuts or breakage
Safety hazards from airborne dust
That’s why professionals and experienced tilers always use diamond blades and wet cutting equipment when working with porcelain.
Step-by-Step: How to Cut Porcelain Tiles Properly
1. Choose the Right Equipment
Wet Saw with Diamond Blade
A wet tile saw with a continuous rim diamond blade is the gold standard for cutting porcelain. The water cools the blade, reduces friction, and minimises dust — giving you smoother cuts and a cleaner finish.
Look for a high-quality wet saw that offers:
Adjustable fence or guide for straight cuts
Plunge capability for notches or L-cuts
Water feed system for blade cooling
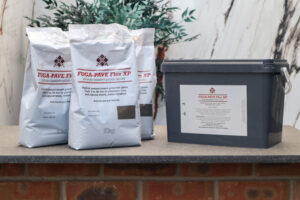
Recommended: Golz GS350A or Zoe 150 wet saw.
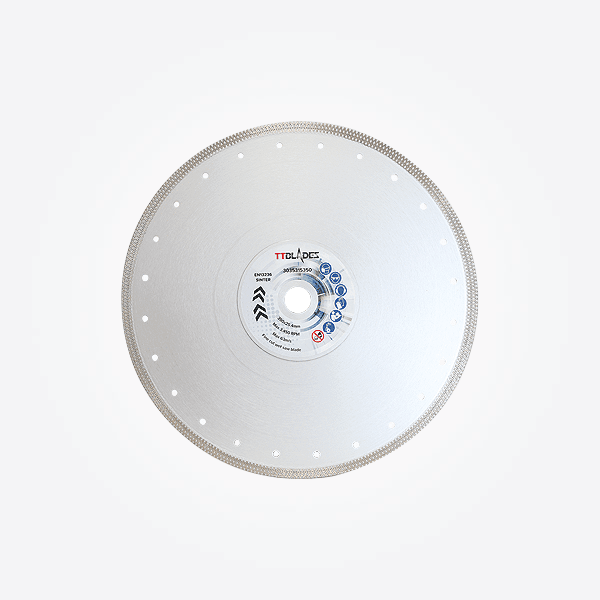
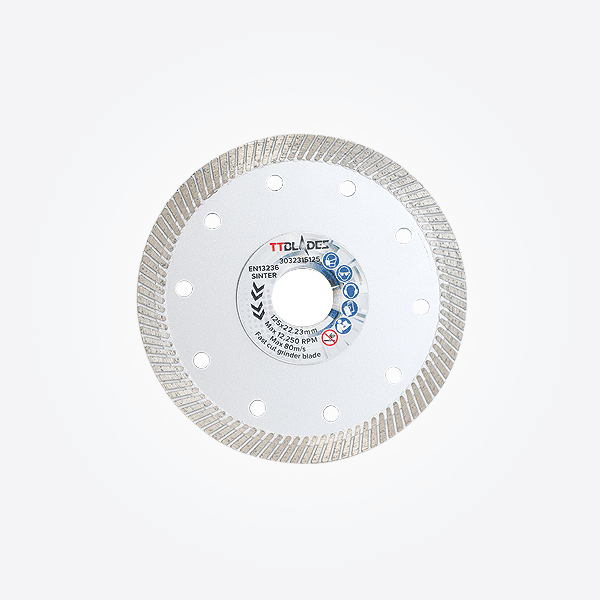
Diamond Blades Designed for Porcelain
Not all diamond blades are the same. You’ll need a porcelain-rated blade, ideally one that’s ventilated for heat control and has a continuous rim for minimal chipping.
Tip: Always check the blade’s RPM and compatibility with your saw.


2. Mark Your Cut
Use a wax pencil or non-permanent marker to clearly outline your cutting lines. If you’re cutting multiple tiles, consider using a template or jig to maintain consistency.
Measure twice, cut once.
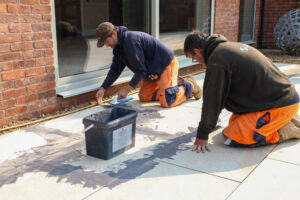
3. Set Up Your Cutting Equipment Correctly

Whether you’re using a wet saw or an angle grinder, correct setup is crucial to ensure accurate cuts, extend the life of your blade, and maintain safe working conditions. Many cutting issues — like misaligned edges, excessive chipping, or blade wobble — can be avoided by taking the time to prepare properly.
Wet Saw Setup Tips
Wet saws are ideal for long, straight cuts and repetitive tasks, especially on 10mm or 20mm porcelain tiles. Here’s how to prepare your wet saw for optimal results:
-
Dress your diamond blade
Diamond blades can glaze over, especially when cutting hard porcelain. Use a dressing stone to sharpen and expose fresh diamond edges. This ensures smoother cuts and prolongs blade life. -
Check the water supply
Always fill the saw’s water reservoir to the correct level. A continuous flow of clean water keeps the blade cool, suppresses dust, and helps prevent tile cracking. -
Clean the saw bed
Even a small stone or bit of dried adhesive on the saw bed can throw off your cut. A 1mm piece of debris under your tile could result in a 5–6mm deviation by the end of the cut. Wipe the bed and guides before every session. -
Secure the fence or guide rail
Make sure your fence is square and locked in place. Loose or misaligned guides lead to poor accuracy. -
Check your blade for damage or wear
Inspect the blade for warping, cracks, or missing segments. Replace if needed — don’t risk using a compromised blade. -
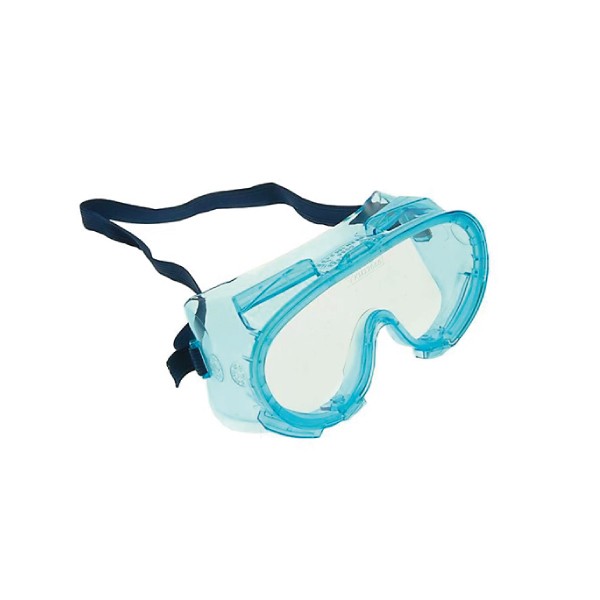
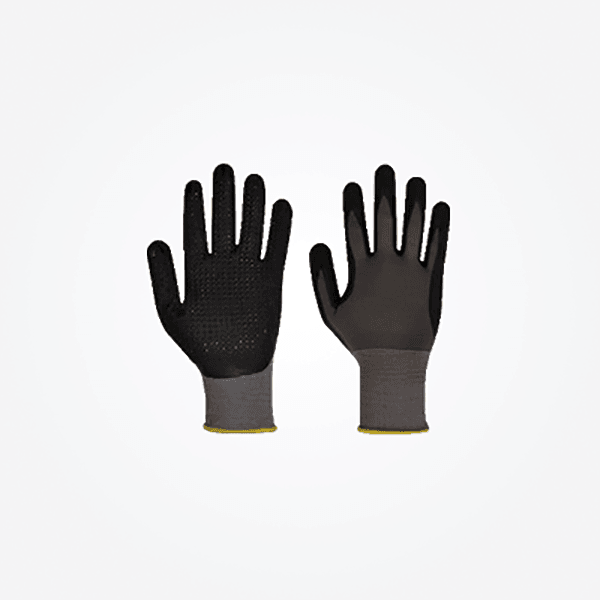
Always wear PPE
Use eye protection, gloves, and ear protection. Even with water suppression, there can be flying particles.
Wet Saw Setup Tips
Angle grinders are useful for detail work, L-cuts, notches, or working on-site without full table setups. When using an angle grinder with a porcelain-rated diamond blade:
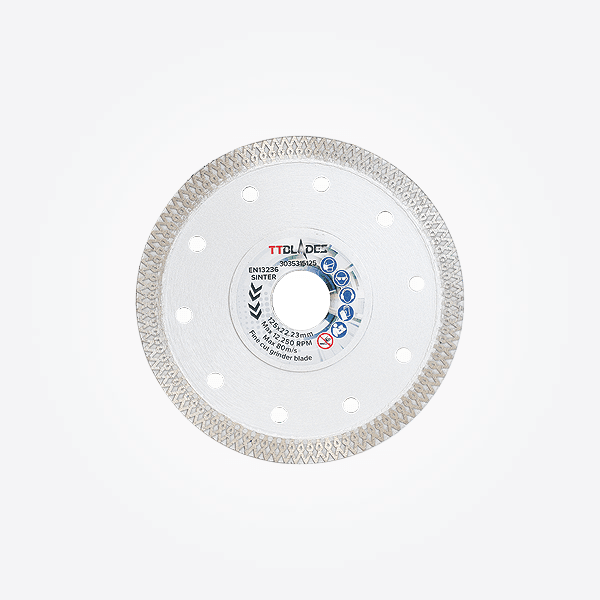
Use a quality blade designed for porcelain
A segmented or turbo diamond blade will work — but ensure it’s rated for porcelain hardness and not general masonry.Use a blade dressing stone
Just like with wet saws, angle grinder blades benefit from periodic dressing to maintain cutting efficiency and minimise chipping.Mark and secure your tile
Use clamps or a non-slip mat to stabilise your tile while cutting. Never hold tiles by hand while using a grinder.Cut in multiple shallow passes
Rather than one deep cut, score the surface lightly, then gradually deepen the cut. This reduces edge blowout and heat build-up.Control dust and protect yourself
Angle grinding creates a lot of airborne dust. Always wear a dust mask, goggles, and gloves. Use a dust-extraction shroud if available, or cut outdoors in a ventilated space.
By taking the time to set up your equipment properly, you’ll get more accurate results, extend the life of your blades, and avoid costly tile breakages. Whether you’re using a full wet saw or just a grinder on-site, preparation is key.


Out of stock
Out of stock
4. Make Your Cut Slowly and Steadily
Once your setup is complete, the cutting process itself is where precision and patience really pay off. Whether you’re using a wet saw or an angle grinder, rushing the cut is the number one cause of chipping, inaccuracy, and damaged tiles.
With a Wet Saw:
Start the saw and ensure water is flowing freely across the blade before beginning your cut. The water not only cools the blade but also helps suppress dust and keep the cutting area clear.
Line up the tile carefully, making sure it’s flush with the fence and sits flat on the saw bed — no rocking or lifting.
Feed the tile slowly into the blade using consistent, gentle pressure. Let the blade do the cutting. Forcing it can result in overheating or chipped edges.
For longer cuts, support the tile evenly to prevent tipping as it moves across the bed. Use extension tables or a second set of hands for larger-format tiles.
With an Angle Grinder:
Begin with a light scoring pass to define your cut line. This helps reduce surface chipping.
Then gradually deepen the cut over 2–3 passes, avoiding the urge to cut through in one go.
Keep the grinder steady and move smoothly through the tile. Sudden movements or stopping mid-cut can cause edge blowout or blade binding.
For curved or irregular cuts, work in small sections and use the edge of the blade like a shaping tool.
Pro Tip:
If you’re cutting small or awkward tile shapes, consider using manual tile nippers or a hole saw to create internal corners or circular cut-outs, then finish with polishing pads.
5. Finish and Smooth Edges with Diamond Polishing Pads
Even with the best tools and clean cuts, most porcelain tiles will benefit from edge finishing — especially if any cut edges will remain visible. Finishing gives your installation a more professional look and prevents sharp edges that could pose a safety risk.
When Should You Finish Tile Edges?
External corners or exposed edges (e.g. tile borders, steps, coping)
Mitre joints for seamless edges
Around drain covers or bespoke cuts
After cutting to correct chipped or slightly rough edges
How to Polish Porcelain Tile Edges:
Use Diamond Hand Polishing Pads
Start with a low-grit pad (e.g. 60 or 100) to smooth out any chips or saw marks, then work through progressively finer grits (200–800 or higher) to refine the finish. These are ideal for small areas, edges, and on-site adjustments.
Use Diamond Polishing Discs with an Angle Grinder or Polisher
For larger projects or high-output work, use a diamond polishing pad kit attached to a variable-speed angle grinder or dedicated polisher. Always start slow and keep the surface lightly misted with water to reduce dust and friction.
Polish Wet or Dry — but Safely
Dry polishing creates dust — always wear a FFP2-rated dust mask, goggles, and gloves. For best results (and safer operation), wet polishing is preferred to reduce heat and airborne particles.